After all costumes have been created as well as assigned & sized to students, you can generate purchase orders to assist you in placing orders with vendors.
It's always a good idea to run an Enrollment Detail Report before creating orders, so you can double-check that all newly enrolled students have been sized. The Enrollment Detail report can also assist you in deciding if any student who has dropped should be changed to Do Not Order on the class Costume Size Entry page.
- Go to the Classes (menu) > Costume Management.
- Click Create an Order (left menu).
- Select a Vendor from the drop-down list (this is required).
- Optionally, select search criteria.
- Click Create Order & Preview.
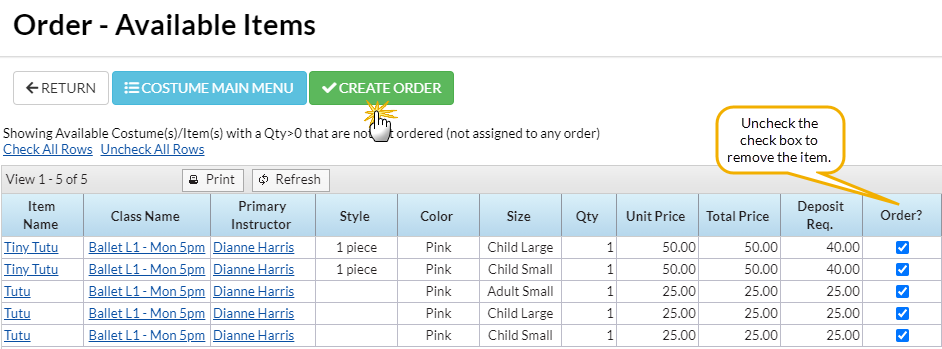
- A preview list will display that shows all available costume items with a quantity greater than 0 that are not yet part of any created order.
- Review the preview. Item Name, Class Name, and Primary Instructor are clickable so you can further investigate the item(s).
- Check/uncheck the Order column checkboxes as needed.
- Click Create Order, after reviewing and making changes, to create the purchase order.
- In the Order Preview pop-up box, enter an Order ID, Order Notes, and choose a Ship-to Address from the drop-down list.
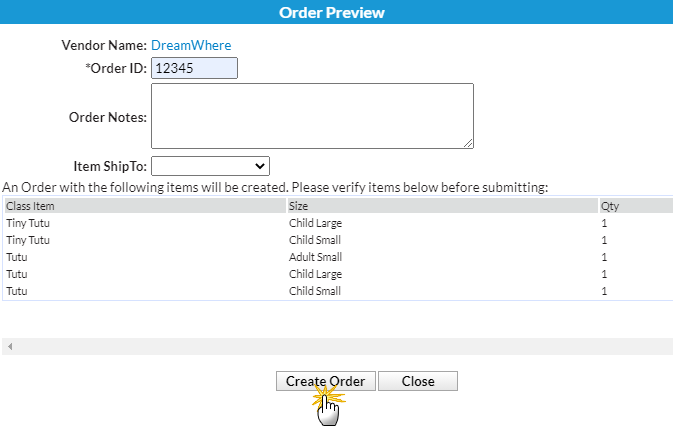
- Click Create Order.
- Click OK.


